

How do i connect Wavlink AC1200 Setup?
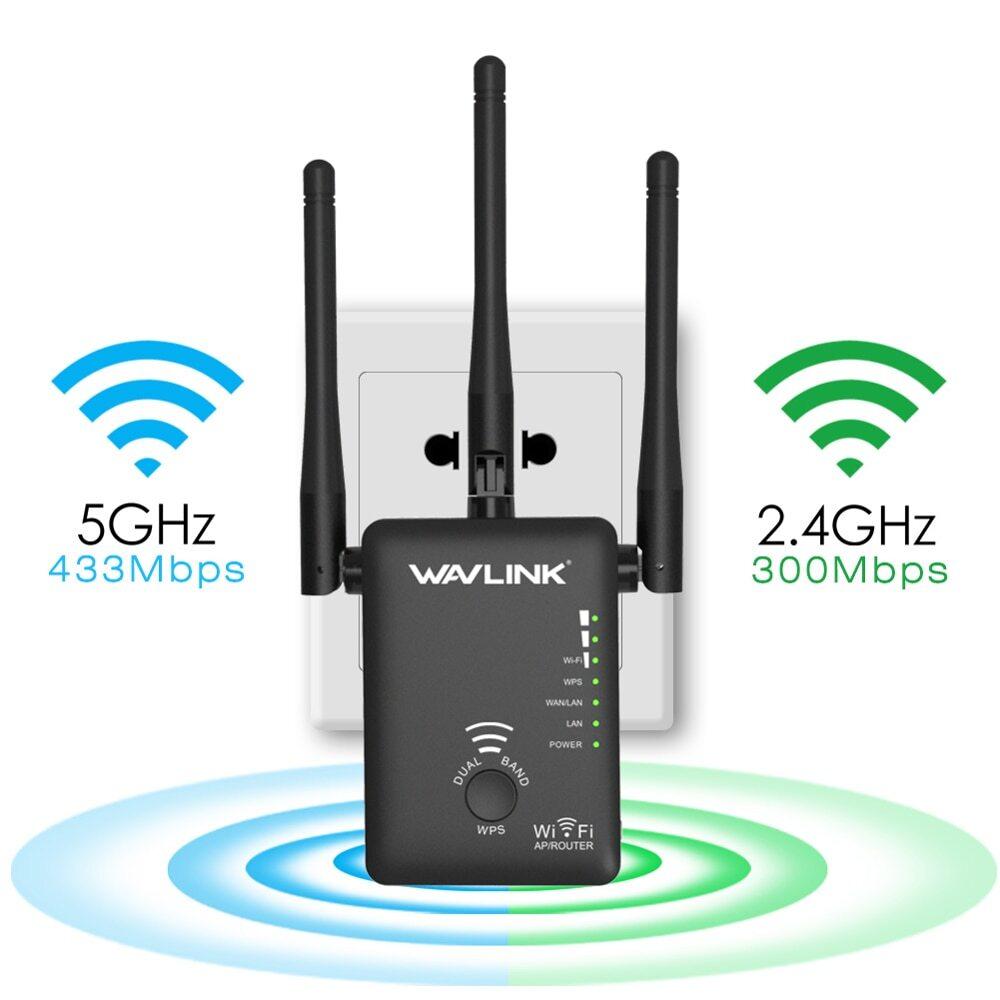
You can easily extend the range of your current wireless network wherever you are with the Wavlink AC1200 wireless range extender. For the purpose of enhancing and boosting the stability of your current network, four antennas are arranged in a special and patented omnidirectional arrangement. You can gradually grow your wireless network with the AC1200 dual-band range extender. Its highly compact size and practical design make deployment simple. Furthermore, because of its reduced design, it blends in seamlessly with the interior design of your house or office. The high-performance antennae enable you to connect all of your devices from wherever in your home. Also, your router and the Wavlink AC1200 wifi extender setup can connect wirelessly.As a result, it starts enhancing the signals from your router right away.
How do I install the Wavlink AC1200 extender with wps?
Use the steps listed below to install the Wavlink AC1200 using the WPS method:
-
Connect the Wavlink AC1200 to an electrical outlet.
-
Watch for the extender to switch on by lighting the solid blue light.
-
Now, hold down the WPS button on the extender.
-
To finish the setup, press the WPS button on the wireless router or modem.
-
The AC1200 should not be unplugged while the extender's LED is blinking.
-
The Wavlink AC1200 WPS setup is now finished.
-
The WIFI repeater's power, client, device, and WPS lights all turn solid green.
-
Wherever the weak signals are, install the Wavlink extender. Make sure your WIFI connectivity is sufficient.
Note: If you need any help regarding wavlink wifi extender setup so contact our technician or visit ap extender setup.
Wavlink AC1200 Range Extender Setup via manual method
Follow these steps to connect the Wavlink AC1200 extender using a web browser:
-
A power outlet should be connected to your AC1200 Range Extender.
-
Your extension must now be in recurring mode.
-
Go to the WIFI settings options on your tablet or laptop.
-
then look for the Wavlink-N network and connect to it.
-
After creating a connection to the extender network, launch any web browser, such as Google Chrome, Mozilla Firefox, or Microsoft Edge.
-
Enter 192.168.10.1 or wifi.wavlink.com in the address field.
-
The Wavlink AC1200 setup page is visible.
-
As directed on the screen, connect your extender to your home network.
How can I reset my Wavlink Dual-Band AC1200 WiFi Extender?
-
Connect the Wavlink AC1200 to an outlet before resetting it.
-
Once the extender's power led light is turned on.
-
Look for a toothpick or a paper clip.
-
Push and hold the reset button for a further 10 to 15 seconds before releasing it.
-
You must now wait till the power led's light turns full green after it turns amber.
-
The addon has now been successfully reset to its factory default settings.
-
You must go through the Wavlink AC1200 setup procedure to reinstall the WiFi extender.
How can I setup my Wavlink AC1200 for WiFi on wavlink.com?
-
To start installing, connect the AC1200 WIFI extender to an electrical outlet.
-
Verify that repeater mode is selected on the extension button.
-
Once the extender's power led light is turned on.
-
Connect to the Wavlink network by going to the WIFI settings option on any wireless device.
-
Open any web browser after connecting, then type wifi.wavlink.com into the address box.
-
You have reached the setup panel for the Wavlink AC1200 extender.
-
Follow the on-screen directions to connect your Wavlink WIFI AC1200 Dual-band repeater to your home wifi network or modem.
-
You are not subject to the CCPA's authority.