

How to Install LED Strip Lights
Learning how to install LED strip lights is a DIY-friendly solution for areas of your home that lack a little extra light. Attach them along your staircases and hallways to make it easier to find the bathroom in the middle of the night. You can set a cozy vibe in your den or bedroom with d
Follow edgarmdowns for more
What Are LED Strip Lights?
Light-emitting diode (LED) strip lights are small, flexible circuit boards with LED lights attached to the front and an adhesive strip on the back. The strips are flexible and can bend up to 90 degrees, making it possible to install them in the corners of a room or around the edges of a shelf. You can find LED lights in various colors, and some brands even offer dimming capabilities to help you set the mood of a room. Check the manufacturer’s instructions for how to cut the strips or connect them by soldering or using connector clips.
LED light strips offer several benefits, including their energy efficiency. When it comes to incandescent vs. LED lights, LEDs are 75% more energy-efficient. That’s one reason many homeowners install budget-friendly LED lights under their cabinets for kitchen task lighting and a helpful night light.
How Much Does It Cost to Hang LED Strip Lights?
LED strip lights cost about $7 to $50 per strip, and the strips may range from just a couple of feet to over 50 feet in length. You can purchase just the LED strip lights or kits with everything you need for easy installation for around $15 to $70.
An LED strip light kit will typically include the transformer to help lower your home’s voltage when plugging in the LED lights; solderless clamps for easily connecting the wires; connector clips to connect multiple strips; and controllers for dimmable or color-changing lights.
If you have a pro install the lights for you, you’ll spend about $60 to $125 per hour on the cost of hiring a handyperson.
Read more: Emergency lighting: What’s required, and how it’s designed
How to Prep for Hanging LED Strip Lights
From shopping for LED strip lights to getting the walls or other surfaces ready for the lights’ adhesive backings, here are a few things to do before you buy and start installing the LED lights around your home.
Choose the Right LED Strip Lights
Not all LED strip lights will work for your home or a specific project, so look at the voltage, density, and weather resistance before making a purchase.
- Voltage and transformer: LED strip lights are typically 12- or 24-volt and will need a transformer, since most electrical outlets are 120- or 240-volt.
- Indoor vs. outdoor: If you’re adding LED strips around the front porch, back patio, or moisture-prone areas like the kitchen, look for weather-resistant or waterproof LED lights.
- Density: Low-density strips have about nine lights per foot and cutting marks every 4 inches. High-density lights have 18 lights per foot, with cutting marks every 2 inches.
Determine the Colors You Want
LEDs also come in various colors, either as one color per strip or a strip that changes colors with a remote control or smartphone. Maybe you want a blue light behind the back of your wall-mounted TV or warm-toned white lights in the hallways.
You might see some acronyms listed on the strip light packaging or online listing. Here’s what they mean:
- RGB (red, green, and blue): Colors, not white; requires four wires
- RGBW (red, green, blue, and white): Colors and white; requires five wires
- RGB and CCT (red, green, blue, and color-corrected temperature): Colors and white, with the added function to switch from cool to warm white; requires six wires
Make sure to purchase electrical wires that correspond with whatever color selection you choose.
Read more: Choose the Right LEDs
Measure the Space
Before shopping for LED strip lights, measure all the areas where you want to add the lights. Add up the length and round up to estimate how many feet of strip lights you’ll need to complete the project.
Clean the Wall
If the wall or surface is oily or dusty, sticking LED lights becomes difficult because the adhesive backing won’t stick. Use a damp cloth to clean the wall and remove debris, then follow up with a dry cloth to remove any moisture. This will keep your strip lights from falling off of the wall later on.
Remember that no matter how much you scrub your brick walls or concrete steps, the adhesive usually won’t stick to rough surfaces. Super-glossy surfaces can also prevent the LED lights from sticking. You may be able to use mounting clips and screw them into the surface to keep the LED light strips in place.
How to Set Up LED Lights in 7 Steps
You’ve found the perfect string lights for the different rooms of your house, and now it’s time to start cutting, connecting, and adhering the lights so you can enjoy the updated ambiance in your home.
Measure to Fit
Before buying the strip lights, you measured the spaces where you wanted to add the lights. Now, it’s time to measure out the strips for each spot in the house. LED lights come in multi-foot strips, and you can cut them at designated spots on the strip, which appear every 2 to 4 inches.
Cut the LED Strips
Use scissors to cut between the lights at the marked spots. These indicators typically look like lines placed between two sets of copper dots. Only cut along these lines to fit the strips to your desired location. If you cut elsewhere, the lights won’t work.
Connect LED Strips
You may need to connect multiple strips if you’re running lights around the perimeter of a room. There are different ways to connect the strips: soldering or solderless clips. Soldering offers a more secure connection, but clips are a reliable option for beginner DIYers.
Solder the Strips
Remember those copper dots that guided you when cutting the strips? You can solder those copper dots on one strip to the wires on another strip to connect multiple LED strip lights but always solder in a well-ventilated space.
Use a soldering iron set to 350 degrees Fahrenheit to melt the copper and wires without burning the copper. Connect the red wire to the positive copper dot and the black wire to the negative copper dot. Let the copper and wires cool for at least 30 seconds before testing them.
Once you’ve confirmed the LED strip lights work after soldering, make sure to use shrink tubing to cover the exposed wire ends and copper. If you’d like to proceed without soldering, skip to the next step.
Clip the Strips
If you successfully soldered your lights, you can skip this step. Your LED light strips may include solderless clips for easy connections. Connect the solderless clamp to the light strip first, and press down to ensure it’s secure. You can use your wire stripper to help with securing it shut.
Next, pull the first inch or so of the wires apart (there should be a wire for each color, plus one for power) and place them in their corresponding slot on the solderless clamp.
Cover Loose Wiring
With adhesive-backed LED strip lights, you may not be left with any loose, exposed wiring, especially if you have solderless connectors. But if you have loose red and black wires, you can use screw-on connectors to cover these wires safely.
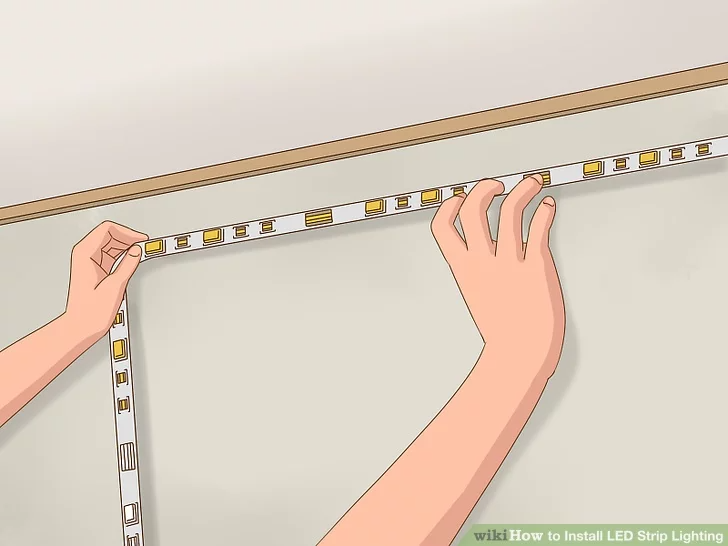
Adhere to the Surface
Position the LED strip lights along your chosen surface. Peel the backing a small amount at a time and adhere the strips to a clean, dry surface. As you attach the LED strip lights, push down on the strips to work out any air bubbles and secure them to the wall or surface.
Add Fixing Clips
This optional step offers more insurance when hanging LED strip lights on a wall. Fixing clips have adhesive backs, and you can nail them down to keep the LED lights in place. If you’re using a kit that includes fixing clips, check the manufacturer’s instructions for how to hook up LED lights.
Light It Up
Plug the LED strip light controller into a voltage transformer. Plug the input side of the voltage transformer into an outlet. The lights should turn on, and you’re ready to kick back and admire your handy work.
Read more: Are LED Grow Lights Bad For Your Eyes?
LED Light Maintenance and Repairs
One of the many benefits of LED lights is that they don’t need a lot of extra attention or care. Once you’ve hung them on the wall, they should last up to 50,000 hours, meaning you may not need to repair or replace the LED strips for several years.
Unlike string lights, you can’t exactly swap out a tiny burned-out bulb on LED light strips. If your LED light strip isn’t working, you can replace the light strip. To do this:
- Follow the cut lines on the LED light strip. Cut along the line between the faulty strip and the working strips.
- Place a new strip between the two other working strips. Ensure the 12V, R, G, and B connection markers are aligned. Solder the four connections in any order.
- Apply a new adhesive backing to the removed LED light strips, if needed.
- Replace the LED light strips on the wall and plug into power up the repaired light strip.
If this still doesn’t work, you may need to remove the LED light strips and replace them with a fresh set. Typically, you shouldn’t run into this issue for many years with the long lifespan of LED lights.
DIY vs. Hiring a Pro
Hanging LED light strips is an easy way to add extra light in the darkest corners of your home. This project is easy and affordable to DIY. But if you don’t have the time or you’re concerned about cutting or connecting the LED strips, you can hire a local handyperson to help you out.
Read more: LED Lighting Guide