

When the sweltering heat of summer rolls in, your Toyota Echo's air conditioning system becomes a lifeline. But what happens when that refreshing cool breeze starts to dwindle? It could be time to replace the aircon pump. Tackling this task yourself saves you money and gives you a sense of accomplishment. Whether you're an experienced DIYer or just starting, replacing your Toyota Echo Aircon Pump can be manageable with the right guidance and tools. This guide will walk you through every step, ensuring you're well-equipped to bring back that chill on those hot days ahead!
DIY Guide: How to Replace the Aircon Pump in a Toyota Echo
Replacing the air conditioner pump in your Toyota Echo can seem daunting, but with a bit of preparation and the right tools, it’s entirely doable. Start by gathering all necessary materials, such as wrenches, screwdrivers, and an AC refrigerant kit. This ensures you won’t have to make multiple store trips mid-projects.
Before diving into replacement, it's crucial to prepare your vehicle properly. Ensure your car is parked on a level surface, and turn off the ignition. Taking these steps helps avoid any accidents while working on your vehicle.
Safety should always come first when undertaking DIY repairs. Wearing safety goggles and gloves protects you from debris or sharp edges during the process. With everything set up correctly, you can dive into replacing that aircon pump!
Understanding the Role of the Aircon Pump
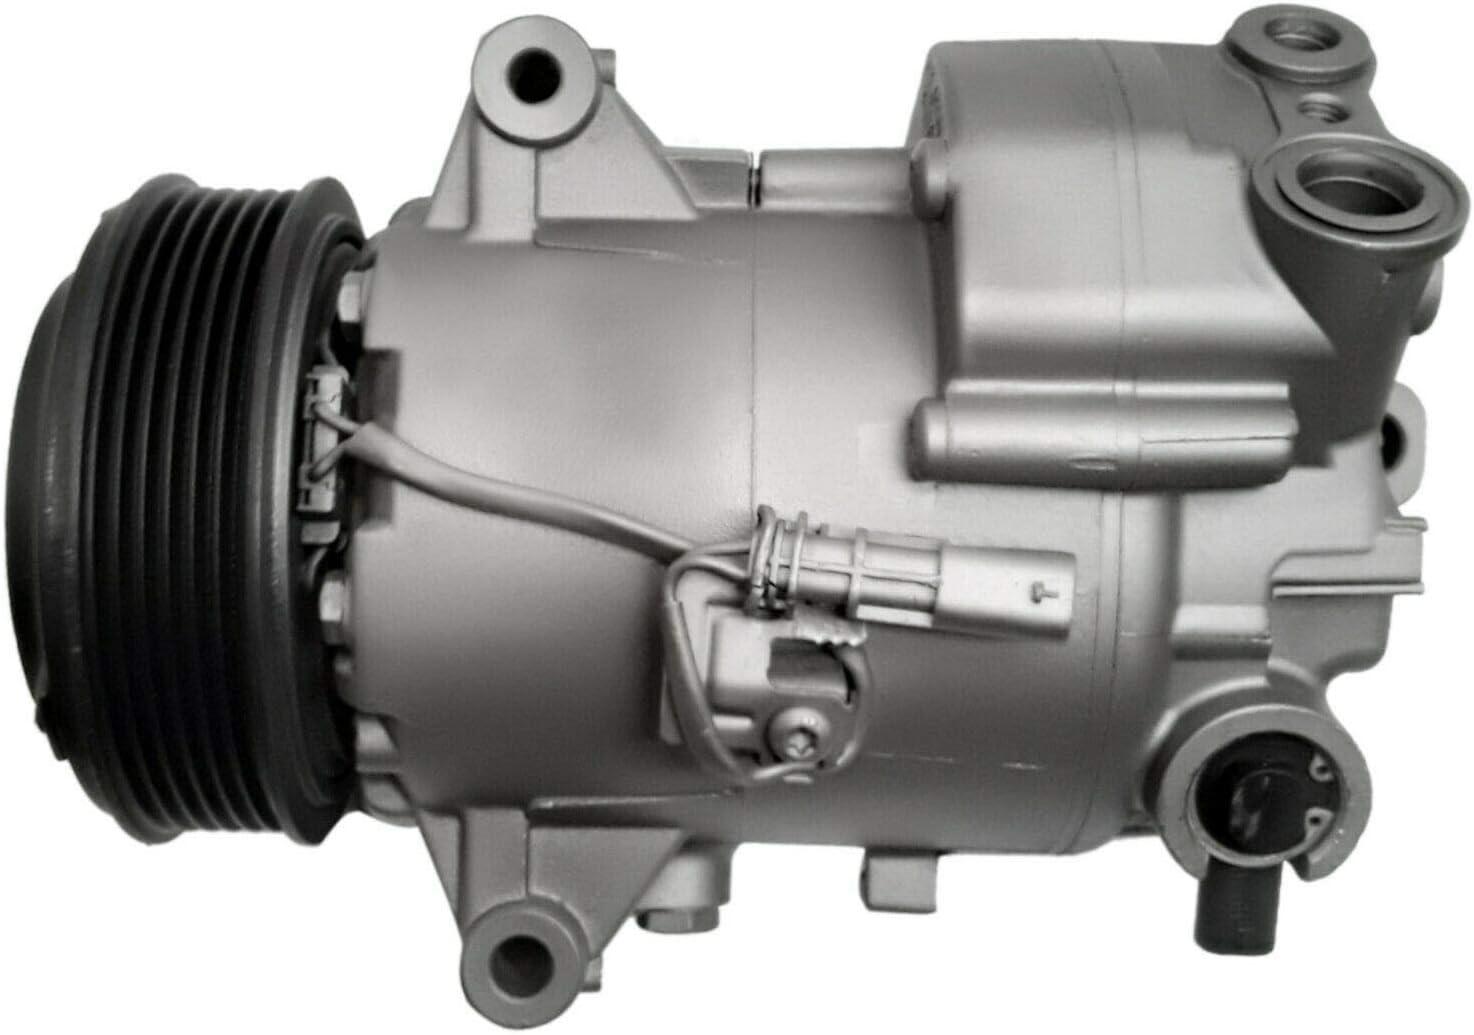
The air conditioning system in your Toyota Echo relies heavily on the aircon pump, also known as the compressor. Its primary role is to compress refrigerant gas and circulate it through the AC system. This process cools down the cabin by absorbing heat from the inside and releasing it outside.
When you turn on your AC, the pump kicks into action, creating high-pressure refrigerant that flows through various components. This cycle is essential for maintaining a comfortable temperature in your vehicle. Without a functioning pump, cool air won’t reach your vents.
Moreover, a healthy aircon pump contributes to overall efficiency. When it operates smoothly, fuel consumption decreases and extends the life of other air conditioning parts. Understanding this component helps ensure the optimal performance of your Toyota Echo's climate control system.
Tools and Materials Needed
Before diving into the replacement process, gather all necessary tools and materials. You'll need a socket set, wrenches, and screwdrivers in various sizes to tackle different bolts and screws throughout the job.
Remember safety gear! Safety goggles and gloves protect your eyes and hands while working. A serpentine belt tool will also make detaching the old pump from its mounting easier.
Ensure you have a new aircon pump compatible with your Toyota Echo. It's wise to check if you'll need additional refrigerant or O-rings for installation. Having everything ready will streamline your project significantly.
Preparing Your Toyota Echo Air Conditioner Compressor for the Replacement
Before starting the replacement, ensure your work area is safe and organized. Park your Toyota Echo Air Conditioner Compressor on a flat surface, preferably in a garage or driveway, where you can avoid distractions. This will help keep everything within reach.
Next, gather all necessary tools and materials. Having everything at hand saves time and prevents unnecessary frustration during the process. Check that wrenches, screwdrivers, and other required components are ready.
Allow your car to cool down if it has been running recently. Working with hot parts can lead to burns or injuries. Once everything is set up correctly, you'll be ready for the task ahead without any hitches.
Safety Precautions
Safety should always be a priority when working on your Toyota Echo aircon pump. Wear protective gear like gloves and goggles to shield yourself from potential hazards. This simple step can prevent injuries from sharp edges or chemicals.
Ensure you’re in a well-ventilated area, especially if handling refrigerants. Proper ventilation helps reduce the risk of inhaling harmful fumes that could leak during the process. Open windows and doors or use fans as needed.
Keep all tools organized and within reach to avoid accidents. A clutter-free workspace decreases the chance of mishaps while you focus on replacing the aircon pump effectively. Taking these precautions ensures both your safety and a successful repair experience.
Step-by-Step Replacement Guide
Start by disconnecting the battery. This is crucial to preventing electrical shocks while working on your Toyota Echo Aircon Pump. Use a wrench to loosen the negative terminal and remove it completely.
Next, locate the old aircon pump. Typically found near the front of the engine, you'll see various hoses connected to it. Carefully detach these connections using pliers or a screwdriver, noting where each piece goes for easy reassembly later.
Once everything is disconnected, you can unscrew the mounting bolts holding the old pump. Remove it gently from its housing and set it aside. With this done, you're ready to install your new aircon pump with all necessary connections made securely.
Disconnecting the Battery
Before you begin working on your Toyota Echo’s aircon pump, it's crucial to disconnect the battery. This step ensures your safety while preventing electrical shorts during the replacement process.
Start by locating the negative terminal of the battery. It’s usually marked with a minus sign (-). Use a wrench to loosen the bolt holding it, and gently lift the cable off the terminal. Secure it away from contact with the battery.
Next, repeat this process for the positive terminal if you're cautious or need extra protection. With both terminals disconnected, you can proceed confidently, knowing that your vehicle's electrical system is safe from accidental activation while you work on replacing your aircon pump.
Removing the Old Suzuki Swift Aircon Pump
Start by locating the old Suzuki Swift Aircon Pump. It’s usually mounted near the engine and connected to various hoses and electrical components. Carefully inspect how it's attached before proceeding.
Next, disconnect any electrical connectors linked to the pump. Remember or label where each connector goes for easier reinstallation later. After that, detach the inlet and outlet lines connected to the pump using a wrench; be prepared for some refrigerant spillage.
Once everything is disconnected, remove any mounting bolts securing the aircon pump in place. Keep these bolts safe; you'll need them to install the new pump later. Gently pull out the old aircon pump; it may require a bit of wiggling if it has been seated tightly over time.
Installing the New Aircon Pump
After removing the old aircon pump, it’s time to install the new one. Begin by ensuring that the replacement pump matches your Toyota Echo's specifications. Align it carefully with the mounting bracket and secure it using the provided bolts. Hand-tighten first before going in with a wrench for a snug fit.
Next, connect all necessary hoses and electrical connectors to their respective ports on the new pump. Make sure everything is seated properly to avoid leaks or malfunctions later on. This step is crucial for the optimal performance of your newly installed unit.
Once everything is connected, double-check your work for any loose fittings or misplaced parts. Attention to detail here can save you from future headaches during operation when you turn on your vehicle's air conditioning system again.
Recharging the Air Conditioning System
After installing your new aircon pump, it’s time to recharge the air conditioning system. This step ensures that your Toyota Echo's AC is filled with the right refrigerant for optimal performance.
Start by locating the low-pressure service port. It's usually found on the larger-diameter aluminium tubing between the evaporator and compressor. Attach a refrigerant canister to this port using an A/C manifold gauge set.
Once connected, follow the manufacturer's instructions on how much refrigerant to add. Monitor pressure levels carefully while filling to avoid overcharging or undercharging, which can lead to ineffective cooling or damage. After recharging, run your vehicle and check if cold air flows consistently from the vents. Adjust as necessary until you achieve comfortable temperatures inside your car.
Testing the New Suzuki Swift Air Conditioning Compressor
After installing the new Suzuki Swift Air Conditioning Compressor, it’s time to put it to the test. Start your Toyota Echo and let the engine run for a few minutes. You want to ensure that everything is functioning smoothly before hitting the road.
Next, turn on your air conditioning system. Listen for any unusual noises coming from the pump. If you hear grinding or rattling sounds, there may be an issue with installation or alignment.
Check for cold air blowing through the vents. The temperature should drop significantly if everything is working properly. If not, revisit your installation steps or consult a professional for further assistance in diagnosing potential issues.
Common Issues and Troubleshooting
You might encounter a few common issues when replacing the aircon pump in your Toyota Echo. One frequent problem is unusual noises coming from the pump after installation. This can indicate loose connections or a misalignment that needs adjusting.
Another issue could be inadequate cooling performance. If the air conditioning isn’t chilling as it should, check for refrigerant leaks or blockages in the system. It’s crucial to ensure all components are properly sealed and functioning.
If you notice erratic cycling of the compressor, it may suggest an electrical problem or faulty pressure switch. Inspect these parts closely to diagnose and fix any underlying issues before they escalate into major repairs.
Maintenance Tips for Your Aircon System
Regular maintenance is key to keeping your Toyota Echo aircon pump running smoothly. Start by checking and replacing the cabin air filter every six months or as your owner’s manual recommends. A clean filter ensures proper airflow, improving overall efficiency.
Next, inspect the refrigerant levels periodically. Low refrigerant can lead to insufficient cooling and increased strain on your system. If you notice a drop, seek professional help for recharging or leak detection.
Run your air conditioning at least once a month, even during cooler seasons. This practice keeps the seals lubricated and prevents them from drying out. Keeping these simple tips in mind will extend the life of your aircon system while ensuring optimal performance year-round.
Conclusion
Replacing the aircon pump in your Toyota Echo can seem daunting, but it's a manageable task with the right tools and guidance. Understanding each step makes it easier to navigate through the process smoothly.
Regular maintenance of your air conditioning system is key for optimal performance. Keeping an eye on potential issues can save you time and money.
Always remember to prioritize safety during any repairs. A well-functioning aircon pump enhances comfort and gives a pleasant driving experience every time you hit the road.
FAQs
How can I tell if the aircon pump is failing?
If you notice weak airflow from your Toyota Echo’s air conditioning vents, it might indicate a failing aircon pump. This reduced performance often means that the pump isn’t circulating refrigerant effectively, leading to less cold air.
Another indicator is unusual noises from the engine bay when you turn on the AC. A grinding or squealing sound may suggest worn bearings or internal damage in the pump itself. Paying attention to these sounds can help catch issues early.
What should I do if the new aircon pump doesn’t work?
If your new aircon pump isn’t working, check the connections. Ensure that all hoses and electrical connectors are securely attached. A loose connection could disrupt the system’s operation.Next, examine the refrigerant levels. Insufficient refrigerant can prevent the air conditioning from functioning properly. If you suspect low levels, consider recharging or inspecting for leaks in the system.
How often should the aircon pump be replaced?
The frequency of replacing the aircon pump in your Toyota Echo can vary. Generally, having it checked every 50,000 to 70,000 miles is a good idea. Factors like driving conditions and maintenance practices play significant roles as well. Consider more regular inspections if you frequently use your air conditioning system or live in extreme climates.
| Related Business Listings |