

How to Build a Minimum Viable Product (MVP): A Step-by-Step Guide
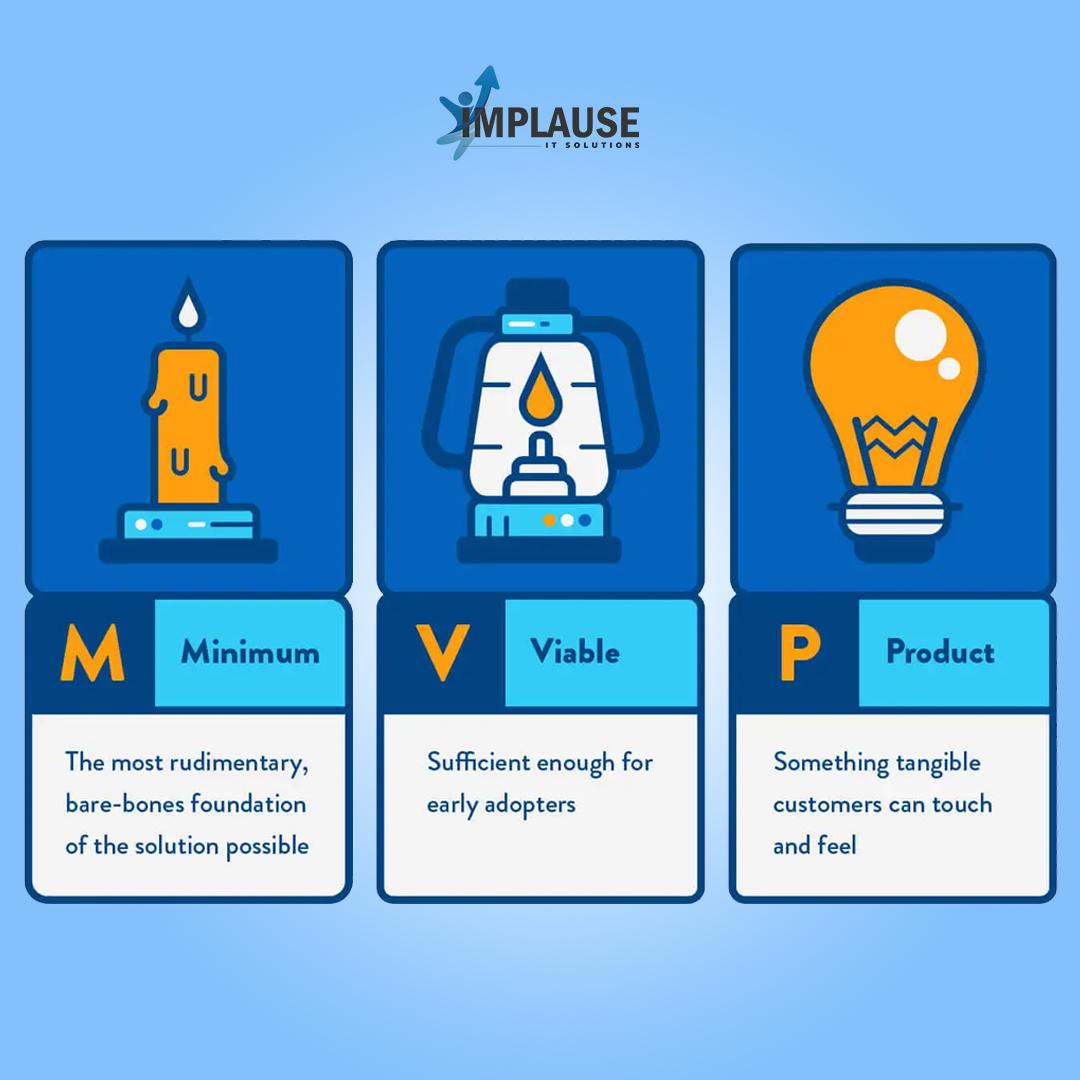
In today’s fast-paced digital world, developing a successful product hinges on the ability to quickly test ideas and gather feedback. This is where the concept of a Minimum Viable Product (MVP) comes into play. An MVP allows businesses to launch a product with just enough features to satisfy early customers and provide critical insights for future development. This guide will walk you through the steps to build a successful MVP, ensuring that your product is both viable and competitive.
1. Define Your Business Objective
Before diving into the technical aspects of building an MVP, it’s crucial to understand the problem you’re trying to solve. What are the goals of your product? Are you addressing a gap in the market or improving on an existing solution? Defining your business objective clearly will guide all subsequent decisions, ensuring that your MVP aligns with your overall vision.
Key Questions to Ask:
What problem does your product solve?
Who is your target audience?
What value does your product offer to users?
2. Conduct Market Research
Understanding your target audience and the market landscape is crucial for building an MVP that resonates with users. Conduct thorough market research to identify potential competitors, understand user needs, and gather insights on what features are most valued by your target demographic. This research will help you prioritize features for your MVP and avoid unnecessary development efforts.
Steps for Effective Market Research:
Analyze competitor products to identify strengths and weaknesses.
Conduct surveys or interviews with potential users to gather feedback on their needs and preferences.
Use online tools like Google Trends and social media analytics to understand market demand.
3. Identify Core Features
Once you have a clear understanding of the market and your business objectives, the next step is to identify the core features that your MVP should include. These are the features that are essential for solving the problem you’ve identified and delivering value to your users. Focus on simplicity and functionality, avoiding the temptation to include every possible feature at this stage.
Prioritization Techniques:
MoSCoW Method: Categorize features into Must-haves, Should-haves, Could-haves, and Won’t-haves.
User Story Mapping: Visualize the user journey and identify the features that are critical for each step.
4. Create a Prototype
With your core features identified, the next step is to create a prototype of your MVP. A prototype is a preliminary version of your product that allows you to visualize the user experience and gather feedback before moving into full-scale development. This can be a low-fidelity wireframe or a high-fidelity interactive prototype, depending on the complexity of your product.
Tools for Prototyping:
Sketch/Figma: For designing user interfaces.
InVision/Marvel: For creating interactive prototypes.
Balsamiq: For low-fidelity wireframing.
Prototyping helps you validate your ideas quickly, allowing you to make adjustments before committing to development.
5. Develop the MVP
Once your prototype has been refined based on user feedback, it’s time to develop the MVP. This is the stage where your ideas come to life through coding and design. Focus on building the core features identified earlier, ensuring that the product is functional and user-friendly. Keep the development process agile, allowing for iterations based on ongoing feedback.
Key Development Considerations:
Choose the right technology stack that aligns with your product needs and scalability requirements.
Ensure that the user interface (UI) is intuitive and easy to navigate.
Implement basic analytics tools to track user behavior and gather data.
6. Test the MVP
Testing is a crucial step in the MVP development process. It allows you to identify any bugs, usability issues, or gaps in functionality before launching the product to a broader audience. Conduct both internal testing with your team and external testing with a small group of users to gather diverse feedback.
Types of Testing:
Usability Testing: Ensures that users can navigate and use the product effectively.
Functional Testing: Verifies that all features work as intended.
Performance Testing: Assesses the product’s speed, responsiveness, and stability.
7. Launch the MVP
After thorough testing and refinement, your MVP is ready for launch. The goal of launching an MVP is to gather real-world user feedback and validate your product’s core assumptions. Choose a specific target audience or a small segment of the market for your initial launch, allowing you to focus on gathering detailed insights.
Steps for a Successful MVP Launch:
Create a marketing plan to promote your MVP to the target audience.
Leverage social media, email marketing, and influencer partnerships to generate buzz.
Offer incentives for early adopters, such as discounts or exclusive access to future updates.
8. Collect and Analyze Feedback
The launch of your MVP is just the beginning. The real value of an MVP lies in the feedback you collect from users. Use analytics tools to track user behavior, gather feedback through surveys and interviews, and analyze the data to identify areas for improvement. This feedback will guide the next iteration of your product, helping you make informed decisions on what features to add or refine.
Tools for Feedback Collection:
Google Analytics: For tracking user behavior and engagement.
Hotjar: For gathering insights on user interactions through heatmaps and recordings.
SurveyMonkey/Typeform: For collecting qualitative feedback through surveys.
9. Iterate and Improve
Based on the feedback collected, iterate on your MVP to enhance its features, address any pain points, and improve the overall user experience. This process of continuous improvement is critical to building a product that meets the needs of your users and stands out in the market.
Best Practices for Iteration:
Prioritize feedback based on user needs and business goals.
Keep the development process agile, allowing for quick adjustments.
Communicate updates and improvements to your users to keep them engaged.
10. Scale Your Product
Once your MVP has been validated and refined through multiple iterations, you can start thinking about scaling your product. This may involve adding new features, expanding to new markets, or increasing your marketing efforts to reach a broader audience. By following the MVP approach, you’ve laid a solid foundation for future growth, minimizing risks and maximizing your chances of success.
Strategies for Scaling:
Feature Expansion: Add new features based on user feedback and market demand.
Market Expansion: Explore new markets or user segments that could benefit from your product.
Partnerships: Collaborate with other businesses or influencers to reach a larger audience.
Conclusion
Building a Minimum Viable Product (MVP) is a powerful strategy for bringing a new product to market with minimal risk. By following this step-by-step guide, you can ensure that your MVP is focused, user-centric, and primed for success. Remember, the key to a successful MVP is not just in the product itself, but in the process of continuous learning and improvement.