


Step-by-Step Guide to Cleaning a Water Tank
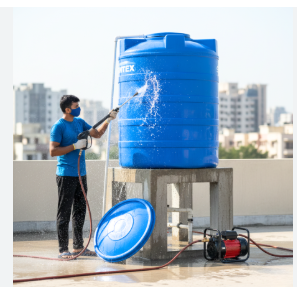
Introduction
A clean water tank is essential for maintaining a safe and healthy water supply for your home or business. Over time, water storage tanks collect dirt, sediment, algae, bacteria, and other contaminants that can affect water quality and pose health risks. Regular cleaning helps remove these impurities, ensuring that the stored water remains fresh and safe for drinking, cooking, bathing, and other daily activities.
Whether you have an overhead or underground water tank, following the correct cleaning process is important. While many homeowners choose professional water tank cleaning services, understanding the cleaning procedure can help you maintain your water storage system more effectively. This step-by-step guide explains how to clean a water tank safely and efficiently.
Why Water Tank Cleaning Is Necessary
Water tank cleaning are exposed to various contaminants over time. Dust, leaves, insects, rust, and mineral deposits can accumulate inside the tank, while bacteria and algae thrive in damp environments. Without regular cleaning, these contaminants can reduce water quality and increase the risk of waterborne diseases.
Cleaning your water tank every six months helps maintain hygiene, improves water quality, and extends the lifespan of the storage tank.
Tools and Equipment Required
Before starting the cleaning process, gather the necessary equipment:
-
Protective gloves
-
Rubber boots
-
Face mask
-
Safety goggles
-
Soft brush or scrubber
-
High-pressure water hose
-
Bucket
-
Wet and dry vacuum (optional)
-
Food-grade disinfectant
-
Clean water for rinsing
Using proper equipment makes the cleaning process safer and more effective.
Step 1: Turn Off the Water Supply
The first step is to switch off the water supply connected to the tank. This prevents additional water from entering while the tank is being cleaned.
If your property has a pump connected to the tank, switch off the pump as well to avoid damage during the cleaning process.
Step 2: Drain the Tank
Open the outlet valve or drain valve to empty the water tank completely. Leave a small amount of water at the bottom to make it easier to remove sediment and sludge.
Dispose of the drained water responsibly, ensuring it does not flood nearby areas.
Step 3: Remove Dirt and Sediment
After draining the tank, inspect the bottom for accumulated dirt, sand, mud, and sludge.
Use a bucket, scoop, or wet vacuum to remove all loose debris. This step is important because sediment can harbor bacteria and reduce water quality.
Take your time to ensure the bottom of the tank is free from heavy deposits.
Step 4: Scrub the Interior Walls
Using a soft brush or non-abrasive scrubber, clean the walls, floor, and corners of the tank.
Focus on removing:
-
Algae
-
Biofilm
-
Mineral deposits
-
Rust stains
-
Sludge residue
Avoid using harsh chemicals or metal brushes that may damage the tank's surface.
Step 5: Wash with Clean Water
After scrubbing, rinse the interior thoroughly using a high-pressure water hose.
Continue washing until all loosened dirt and cleaning residue have been removed. Pay special attention to corners and hard-to-reach areas where debris may remain.
Step 6: Disinfect the Tank
Disinfection is one of the most important steps in the cleaning process. Apply a food-grade disinfectant approved for drinking water storage tanks.
Allow the disinfectant to remain on the tank surfaces for the recommended contact time to eliminate bacteria, viruses, fungi, and other harmful microorganisms.
Always follow the manufacturer's instructions when using disinfectants.
Step 7: Final Rinse
Once the disinfection process is complete, rinse the tank thoroughly with clean water.
Make sure no disinfectant residue remains inside the tank before refilling it. Residual chemicals may affect the taste and safety of the stored water.
Inspect the tank carefully to ensure it is completely clean.
Step 8: Inspect the Tank for Damage
Before refilling the tank, inspect the interior and exterior for signs of damage.
Check for:
-
Cracks
-
Rust
-
Leaks
-
Loose fittings
-
Damaged lids
-
Broken seals
Repair any problems immediately to prevent contamination and water loss.
Step 9: Refill the Tank
After cleaning and inspection are complete, refill the tank with fresh, clean water.
Allow water to circulate through the plumbing system for a few minutes before using it for drinking or cooking.
This helps flush out any remaining particles from the pipes.
Step 10: Close the Tank Properly
Ensure the tank lid is tightly secured after cleaning.
A properly sealed tank prevents:
-
Dust from entering
-
Insects
-
Rodents
-
Leaves
-
Rainwater contamination
Keeping the tank covered is one of the simplest ways to maintain water quality between cleanings.
Safety Tips During Water Tank Cleaning
Cleaning a water tank involves working in a confined space, so safety should always be a priority.
Follow these precautions:
-
Wear protective clothing.
-
Never enter a large tank alone.
-
Ensure proper ventilation.
-
Use non-toxic cleaning products.
-
Turn off electrical equipment before cleaning.
-
Avoid slipping on wet surfaces.
-
Use proper lighting inside the tank.
If the tank is large or difficult to access, hiring professional cleaners is the safest option.
Benefits of Professional Water Tank Cleaning
Although homeowners can clean smaller tanks themselves, professional cleaning services provide several advantages.
Professionals offer:
-
Specialized cleaning equipment
-
Safe disinfection methods
-
Experienced technicians
-
Faster cleaning process
-
Thorough inspection
-
Better hygiene standards
Professional cleaning ensures the tank is completely sanitized and ready for safe water storage.
How Often Should You Clean Your Water Tank?
Most experts recommend cleaning residential water tanks every six months.
However, more frequent cleaning may be necessary if:
-
Water quality is poor.
-
The tank is located in a dusty area.
-
Algae grows quickly.
-
The tank is heavily used.
-
You notice unpleasant odors or discoloration.
Regular inspections help determine the best cleaning schedule for your property.
Conclusion
Water tank cleaning is an essential part of maintaining a healthy water supply. By following a systematic cleaning process—draining the tank, removing sediment, scrubbing the interior, disinfecting the surfaces, and inspecting for damage—you can ensure that your stored water remains clean and safe for everyday use.
Routine maintenance not only protects your family's health but also improves water quality, prevents plumbing issues, and extends the lifespan of the tank. Whether you choose to clean the tank yourself or hire professional water tank cleaning services, regular cleaning every six months is a smart investment that provides long-term benefits.

 Arabic
 Français
 Español
 Português
 Deutsch
 Türkçe
 Dutch
Dutch
 Italiano
 Russian
 Romaian