


Avoid These Common Expert LVT Floor Installation Mistakes
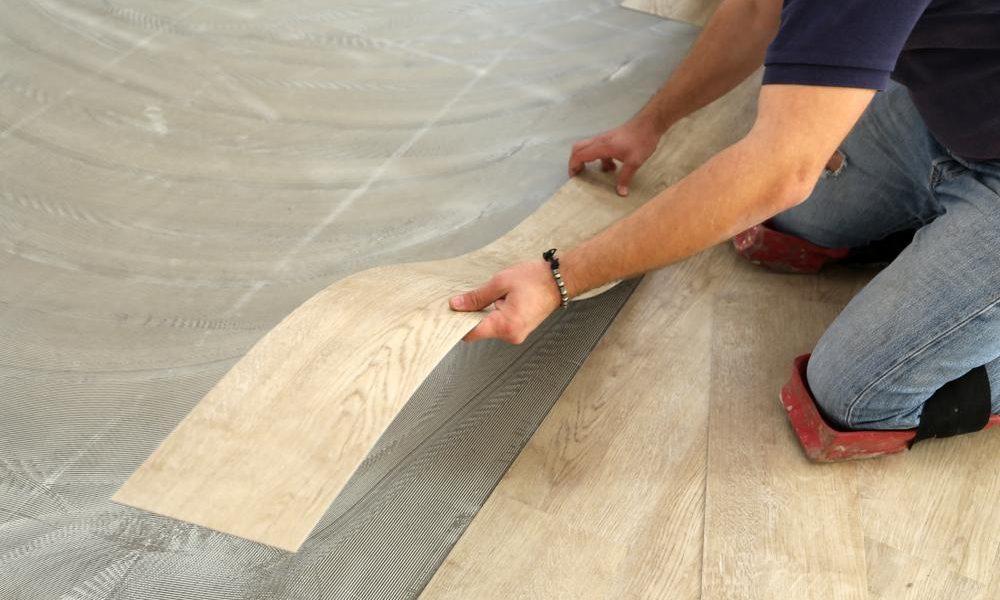
Ensure your renovation succeeds. Discover how to avoid typical pitfalls during the setup of luxury vinyl tiles for a durable, beautiful finish in your home.
Luxury vinyl tile remains a popular choice for modern homes due to its durability and realistic aesthetic. However, achieving professional results requires careful planning and precise execution. An expert LVT Floor Installation provides the structural integrity needed to withstand years of heavy foot traffic. Floors Bay advises homeowners to prioritize thorough preparation to avoid common issues like buckling or premature wear. Many residents attempt DIY projects, yet they often overlook critical steps like subfloor moisture testing or proper acclimation. Consequently, these small oversights lead to significant problems that require costly corrections later. You protect your investment by understanding the technical requirements of the material before you begin. Furthermore, professional guidance helps you navigate the complexities of layout and seam integrity. You deserve a floor that looks impeccable and lasts for decades. This guide highlights the most frequent errors and provides actionable advice to ensure your project meets the highest standards. By choosing the right approach, you create a beautiful, long-lasting surface that complements your home perfectly.
Neglecting Essential Subfloor Preparation
The foundation of your project determines the success of the entire floor. You must ensure the subfloor is clean, dry, and perfectly level before laying any tiles. Furthermore, moisture remains the primary enemy of vinyl products. Professionals use specialized tools to measure humidity levels and identify any signs of rising dampness. If the surface contains bumps or debris, these imperfections show through the thin vinyl layer. Consequently, you must sand down high spots and fill cracks using professional-grade leveling compounds. Floors Bay emphasizes that skipping these steps creates weak points that lead to loose tiles over time. Proper preparation takes time, yet it saves you from the frustration of a failing floor. You create a smooth, solid base that allows the tiles to bond securely for long-term performance.
Essential Subfloor Checks
-
Verify the subfloor is free of dust, grease, and debris.
-
Check for moisture levels using a professional hygrometer.
-
Sand high spots on concrete or wooden subfloors until level.
-
Fill all holes or depressions with a compatible leveling compound.
-
Ensure the surface is completely dry before beginning the work.
Failing to Allow Proper Material Acclimation
Acclimation stands as a critical step in the setup process. You need to let the materials sit in the room for at least 48 hours before you start. An affordable LVT Floor Installation requires the tiles to reach room temperature to prevent future expansion or contraction. Furthermore, the boxes must lay flat to maintain their shape during the settling period. Professionals understand how temperature fluctuations affect the physical dimensions of vinyl. Consequently, you avoid gaps forming between tiles after the glue cures or the click-lock mechanism engages. Likewise, do not store boxes in damp basements or hot garages before the project. You ensure dimensional stability by allowing the material to adjust naturally. Proper timing removes the risk of shifting tiles that otherwise ruin the look of your new floor.
Best Acclimation Practices
-
Keep the room at a steady temperature for the entire duration.
-
Lay the boxes flat rather than stacking them vertically against walls.
-
Ensure the space has adequate ventilation for consistent air movement.
-
Avoid opening the boxes until you are ready to begin work.
-
Monitor local weather conditions to ensure your home remains temperate.
Skipping the Correct Layout and Seam Integrity
Layout errors often result in awkward cuts and visible seams that detract from the floor’s beauty. You should plan the design to avoid tiny, fragile slivers of tile at the room’s perimeter. Furthermore, staggering the joints creates a more natural look and increases the structural stability of the floor. Many people forget that luxury LVT flooring requires specific patterns to distribute weight evenly. Professionals use spacers to maintain consistent gaps, as the material needs room to move. Consequently, you prevent the buckling that occurs when tiles press against walls. You must also ensure that every click-lock joint snaps firmly into place. Using an expert LVT flooring in Leesburg specialist helps you achieve a layout that maximizes both aesthetics and performance. An organized pattern reflects professional care and keeps your room looking spacious.
Planning for Better Results
-
Measure the room carefully to center the layout properly.
-
Avoid leaving gaps smaller than half a tile at the edges.
-
Stagger the seams to ensure a professional and secure finish.
-
Use appropriate spacers to allow for natural material expansion.
-
Check every joint for a secure lock before moving forward.
Ignoring Manufacturer Instructions and Requirements
Every brand has unique specifications regarding adhesives, underlayment, and installation techniques. You should never assume that one method applies to every product on the market. Furthermore, ignoring the manufacturer’s warranty requirements often leads to a voided claim if problems arise later. Professionals always read the provided documentation to understand the specific needs of the material. Consequently, you follow the exact temperature and humidity guidelines required for a successful finish. An affordable LVT floor installer near me will confirm these details before starting the project. You avoid the risks of using incompatible glues or incorrect tools that damage the material. Always prioritize the manual provided with your specific tiles to ensure your warranty remains valid. Following expert guidance is the safest path to a high-quality, long-lasting floor.
Following Manufacturer Guidelines
-
Read the entire manual before touching the materials.
-
Use only the specific adhesives recommended by the brand.
-
Verify if your product requires a specific type of underlayment.
-
Adhere to all drying times before you begin walking on the floor.
-
Contact the manufacturer directly if you have technical questions.
Poor Lighting and Final Quality Control
Working in low light often masks mistakes that become obvious once the project is finished. You should use high-intensity work lights to check every corner and seam during the work. Furthermore, inspect the tiles for any defects before you lock them into place. Professionals look for consistent color blending to avoid creating obvious patches of darker or lighter shades. Consequently, you achieve a balanced appearance throughout the entire room. An expert LVT Floor Installation requires constant vigilance to identify and fix errors in real-time. Do not rush the final stages of the process, as this is when precision counts the most. You maintain high standards by verifying the quality of every single row. A thoughtful approach results in a stunning, seamless floor that you will appreciate for many years.
Ensuring a Quality Finish
-
Work with bright, directional lighting to see every detail.
-
Mix tiles from multiple boxes to ensure a natural color blend.
-
Wipe away excess adhesive immediately to prevent staining the surface.
-
Walk across the finished floor to check for soft spots or movement.
-
Clean the surface thoroughly once the work is complete.
Mismanaging the Perimeter and Transitions
Finishing the edges correctly defines the professional look of your room. You must leave a small gap around the perimeter to accommodate movement, as tiles need space to expand. Furthermore, use appropriate transition strips between different flooring types to protect the edges. Professionals install baseboards or shoe molding to cover these gaps without restricting the floor. Consequently, you create a polished look that hides the necessary clearance space. An affordable LVT Floor Installation depends on these small details to prevent damage in high-traffic areas. You must also ensure that transitions sit flat to avoid creating tripping hazards. Quality trim work is the final step that elevates your project from a simple DIY task to a professional-grade upgrade.
Tips for Perfect Edges
-
Use a tapping block to fit tiles near walls without damage.
-
Install high-quality transition strips for a smooth, safe shift between rooms.
-
Apply shoe molding to hide expansion gaps cleanly.
-
Verify that your trim does not pinch the floor tiles.
-
Check all doorways for flush, level transition results.
Conclusion
Installing vinyl tiles requires attention to detail, proper preparation, and a commitment to following professional standards. By focusing on subfloor health, material acclimation, and precise layout planning, you ensure a durable finish. You now understand the common mistakes that lead to failure, including ignoring moisture and skipping manufacturer guidelines. Choosing a professional partner ensures that your home receives the care and precision required for such an important upgrade. Whether you are looking for reliable LVT flooring in Leesburg or need to find an expert LVT floor installer near me, local experience is vital. Choosing a reliable LVT flooring in Leesburg expert allows you to leverage industry knowledge for your home's long-term protection. Likewise, hiring an affordable LVT floor installer near me ensures your flooring project continues without the stress of buckling or loose tiles. Do not wait for a major issue to appear before focusing on your floor’s quality. By investing in proper planning and hiring proven professionals, you extend your floor’s life and protect your business or residential budget effectively. Remember that your floor is one of the most visible assets of your property, deserving of the same care as your other vital home elements. Take the time to build a solid plan today, identify your trusted service partner, and commit to the ongoing health of your living space. Your proactive efforts today will pay off in long-term reliability and significant cost savings.
FAQs
How long should I wait before walking on newly installed luxury vinyl tiles?
It is generally best to wait at least 24 hours before walking on a newly installed floor. While some click-lock flooring can handle light foot traffic sooner, allowing extra time helps ensure a secure installation.
Can luxury vinyl tiles be installed over an existing floor?
Yes, in many cases. The existing floor must be clean, level, dry, and structurally sound to provide a stable base for the new flooring.
What is the best way to clean luxury vinyl tile flooring?
Clean the floor with a pH-neutral cleaner and a microfiber mop. Avoid steam cleaners and abrasive cleaning products, as they can damage the floor's protective finish.
Is a vapor barrier necessary for luxury vinyl tile installation?
A vapor barrier may be needed depending on the type of subfloor. Concrete subfloors often require one to prevent moisture problems, while wood subfloors may not.
How can I replace a damaged luxury vinyl tile?
The replacement method depends on the installation type. Glue-down tiles can usually be removed and replaced individually, while click-lock flooring may require removing several planks or tiles to access the damaged section.

 Arabic
 Français
 Español
 Português
 Deutsch
 Türkçe
 Dutch
Dutch
 Italiano
 Russian
 Romaian