


How Pros Prep and Protect a Car's Surface
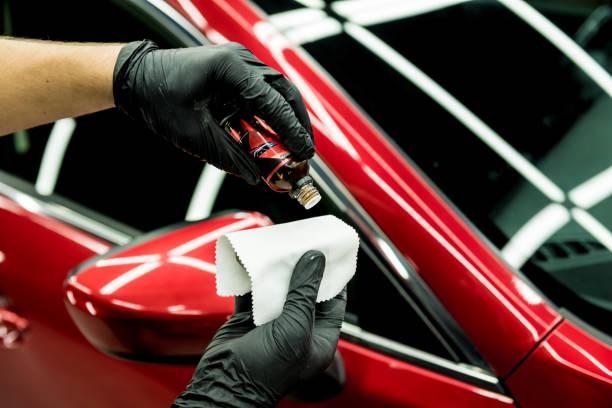
Most car owners hand over their keys, sit in a waiting room, and get their vehicle back a few hours later with no real idea what happened in between. That's a problem. A protective coating job can run several hundred dollars, sometimes more, and the results depend almost entirely on what the technician does before a single drop of product ever touches the paint. If prep is rushed or skipped, the coating won't bond properly and you'll see failures within months. So here's a plain-language walkthrough of every stage, from the first rinse all the way through cure. If you're looking at Ceramic Coating in Oceanside CA, this is what a proper job actually looks like.
Stage 1: Decontamination Wash
A regular hose-down doesn't cut it. Not even close. A decontamination wash is a multi-step process designed to strip the paint of things that normal soap can't touch, things like iron particles from brake dust, industrial fallout, and embedded road grime that's worked its way into the clear coat over months of driving.
Technicians start with a pH-neutral soap and a proper two-bucket wash method to get the surface clean without scratching it. After that, they spray an iron fallout remover, which turns purple as it reacts with metal particles bonded to the paint. That color change tells you it's working. Then comes the clay bar treatment, where a small block of clay is glided across lubricated panels to physically pull out contaminants the chemicals left behind. Run your finger across the paint after claying and it feels like glass. That's the goal. You can read more about how different car wash methods affect paint surfaces if you want the background science on why this step matters so much.
Stage 2: Paint Correction
This is the stage most customers don't expect. Paint correction means using machine polishers to remove swirl marks, light scratches, and oxidation from the surface. It's done before any protective product goes on, not after, because coating over damaged paint just locks the damage in permanently.
Technicians usually work in two or three passes. A heavier compound cut first, to remove the worst defects. Then a finer polish to refine the surface and bring the gloss up. The goal is an optically flat finish, meaning light reflects off it evenly with no scattered hazing from micro-scratches. This stage alone can take two to four hours on a full-size vehicle. Worth it. A coating applied over corrected paint looks dramatically better and bonds more consistently than one slapped onto a neglected surface.
Stage 3: Panel Wipe-Down and IPA Prep
Here's where a lot of DIY jobs fall apart. After polishing, the paint looks great, but it's covered in polish oils and filler residue left behind by the compounds. Those oils act like a barrier. If you apply a coating over them, it won't bond to the actual paint, it'll bond to the oil film, and eventually that film breaks down and takes the coating with it.
The fix is an isopropyl alcohol solution, usually somewhere between 70 and 99 percent concentration depending on the product being used afterward. Technicians wipe every single panel individually with fresh microfiber cloths, working in a controlled environment with no wind or dust. They'll fold and flip the cloth constantly to avoid redepositing residue. It sounds tedious. It is. But skipping it or doing it sloppily is one of the most common reasons coatings fail early. If a shop rushes this step, you'll know it later when the coating starts peeling or hazing in patches.
Stage 4: Product Application
Now the actual coating goes on. And it's slower than you'd think. Technicians apply the liquid in small cross-hatch sections, usually a few square inches at a time, using a foam or suede applicator block wrapped in a specific cloth. The cross-hatch pattern (horizontal passes followed by vertical passes) makes sure no spots are missed and the product spreads evenly.
Every coating has what's called a flash-off window. That's the time between application and leveling, usually somewhere between 30 seconds and two minutes depending on the product, temperature, and humidity. During that window, the coating starts to cure and you'll see it "flash," meaning it shifts from wet-looking to a slightly hazy finish. That's when you buff it level with a clean microfiber. Miss the window and you get high spots, dried-on raised areas that are extremely difficult to fix without cutting back into the surface. Shak's Shine Auto Spa is one of the shops in Oceanside that trains technicians specifically on timing and environment control for this reason, because small errors here cause big headaches later.
Temperature matters a lot at this stage. Most coatings work best between 60 and 80 degrees Fahrenheit with low humidity. Too hot and the product flashes too fast. Too cold and it doesn't cure properly. Professional shops apply coatings in climate-controlled bays for exactly this reason.
Stage 5: Cure Time and Post-Care Rules
The coating is on. But it's not done. Not yet. The first 24 to 72 hours are when the chemical cross-linking happens, meaning the coating is literally hardening at a molecular level into a glass-like layer over the paint. During that window, the car can't get wet, can't be touched, and definitely can't sit outside where dew or rain can hit it.
Water spots that form during the cure window don't just sit on top. They get locked into the surface as the coating hardens around them. That's a nightmare to fix. So the car needs to stay in a dry, covered space for at least the first 24 hours, ideally 48.
After that initial window, the first 30 days matter too. Most coatings reach full hardness around the 30-day mark. During that period, owners should avoid automated car washes with abrasive brushes, skip any wax or paint sealant products, and wash the car by hand with a pH-neutral soap only. Bird droppings and tree sap should be removed quickly, because acidic contamination can still affect the curing surface. Follow the post-care rules and the coating can last years. Ignore them and you might be back at the shop in six months wondering what went wrong.
If you're anywhere near San Diego County and want Auto Ceramic Coating in Oceanside CA done properly, it's worth asking any shop you're considering to walk you through each of these stages before you book. A good technician will answer without hesitation. A shop that gets vague about prep is a shop worth avoiding.
Frequently Asked Questions
How long does the full process take?
It depends on the condition of the paint and the size of the vehicle, but most full jobs, including decontamination, paint correction, and application, take anywhere from one to two full days. Don't trust a shop that promises a complete job in two or three hours. That timeline doesn't leave room for proper prep.
Do I need paint correction every time, or just the first time?
Correction is typically needed the first time, or any time the coating has been removed and the paint has accumulated new defects. Reapplication on a well-maintained surface is faster because the paint is already in good shape. But if you've been skipping washes or the clear coat has oxidized, correction will be needed again.
Can I get Ceramic Coating in Oceanside CA if my car has existing chips or deep scratches?
Yes, but the coating won't fix those. It'll protect the paint that's already there, including the area around chips, but it won't fill in damage. Deep scratches usually need touch-up paint or wet sanding before the coating goes on. Ask your technician to inspect the paint first and let you know what they find.
What happens if the car gets rained on during the cure window?
Water during the first 24 to 48 hours is the biggest post-application risk. If rain hits the surface while it's still curing, water spots can bond into the coating permanently. If this happens, a technician may be able to lightly polish the affected areas and reapply, but it's extra work and extra cost. Keep the car covered and dry for at least two days after application.
Is Auto Ceramic Coating in Oceanside CA worth the price compared to wax?
Wax lasts a few weeks to a few months. A properly applied ceramic coating, maintained well, can last two to five years or longer. The upfront cost is higher, but you're not reapplying every season. For anyone who wants long-term protection without constant upkeep, the math usually works out in favor of coating over time.

 Arabic
 Français
 Español
 Português
 Deutsch
 Türkçe
 Dutch
Dutch
 Italiano
 Russian
 Romaian